SelectYourLanguage

Pulldown 2
Pulldown 2
Pulldown 2
Pulldown 2
Pulldown 2
Pulldown 2
Pulldown 2
Pulldown 2
Pulldown 2

eurocol
350 LIQUIDDESIGN

350

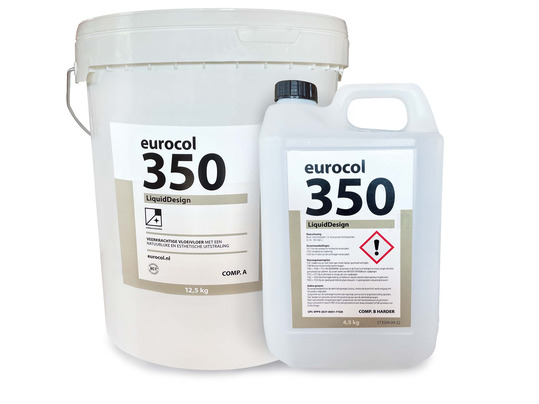
A resilient liquid floor with a natural look & feel and aesthetic appearance. 2-component liquid mass with a balanced mixture of natural components such as cork, wood flour, modified castor oil and binding agents based on renewable raw materials. Available in 22 modern colours.
350-liquiddesign.jpg
  • dop-declaration-uk.pdf

    dop-declaration-uk.pdf

  • 350a-safety data sheet uk.pdf

    350a-safety data sheet uk.pdf

  • 350b-safety data sheet uk.pdf

    350b-safety data sheet uk.pdf

  • breeam attestation uk.pdf

    breeam attestation uk.pdf

  • 350-ec 1 plus llicence  uk.pdf

    350-ec 1 plus llicence  uk.pdf

  • pdf-product-specification.pdf

    pdf-product-specification.pdf

Product Typification

A resilient liquid floor with a natural look & feel and aesthetic appearance. 2-component liquid mass with a balanced mixture of natural components such as cork, wood flour, modified castor oil and binding agents based on renewable raw materials. Available in 22 modern colours.
Basis : 2-component liquid mass with a balanced mix of natural components such as cork, wood flour, modified castor oil and binders based on renewable raw materials. Component A: B 12.5: 4.5
Colour : 22 modern colours.
Consistency : Thick, liquid.

Product advantages:
    • EMICODE EC 1PLUS (very low emissions)
    • Environmentally friendly
    • Easy to process
    • Low tension
    • Resilience
    • Outstanding adhesion
    • Layer thickness approx. 2 mm
    • Suitable to combine with underfloor heating

Performances

Bureau Wheelchair resistance : Suitable for use with desk wheelchairs. EN 425
Classification : GEV-EMICODE EC 1PLUS (very low emissions) tested according to EN 13999-2/4. Suitable for BREEAM projects.
Colour fastness : 8 blue wool scale. EN-ISO-105-B2
Consumption : 2.7 kg/m².
Flammability : See safety data sheet.
Passableness : After 12 hours.
Person-charge : < 0,5 kV. EN 1815
Shore D : Approx. 40 Shore D.
Slip resistance : DS: ≥ 0.45. EN 13893. R9 DIN 51130
Slip test : SRT pendulum dry: between 55 - 70, wet: >25. BS7976-2+A1
Specific weight : 1.36 kg/l (A+B).
Thermal resistance : 0.043 m² x K/W.
Fire class : Bfl-S1. EN 13501-1
Rest impression : Approx. 0,02 mm. EN ISO 24343-1
Noise reduction : ΔLw 5 dB directly applied to a levelling layer. ΔLw 14 dB applied to a 2 mm thick intermediate layer Corkment. EN-ISO 10140-3.

Application

Application:
Creates an attractive and permanently resilient liquid floor with a natural look & feel on a previously levelled surface. Thanks to natural and renewable raw materials, this liquid floor is environmentally friendly.

Working Process

Layer thickness : Approx. 2 mm
Tools : 836 Decokam holder 28cm. 837 Decokam insert strip no. 78, 855 Mixing rod, 834 Bleed roller 20 mm, 824 LiquidDesign mixing bucket 20 litres, Sieve approx. 400 µm, Standard pinhole soles with studs (for applying 350 LiquidDesign), 835 Stump nail shoes (pin diameter min. 10 mm), for coating, 828 Microfibre roller 11 mm, width 25 cm and 830 Microfibre roller 11 mm, width 50 cm.
Sound reduction : ΔLw 5 dB directly applied to a levelling layer. ΔLw 14 dB applied to a 2 mm thick intermediate layer Corkment. EN-ISO 10140-3.
Use class : Very heavy commercial use. Class 33. EN ISO 10874
Processing time : Approx. 30 minutes (depending on climate conditions).
Storage : Store in a cool and frost-free place (between 10° - 30 °C and never in direct sunlight)
Shelf Life : 9 months in unopened packaging.
Drying : Finish after at least 12 hours and the whole surface is completely hardened after 8 days.*
Sensitive to frost : Yes.

* The mentioned values have been established in our laboratory and must be considered as guidelines in view of possible variations in climatic circumstances, subfloor compositions and layer thickness.

Consumption:
2.7 kg/m².

Substrate:
  • 350 LiquidDesign should always be applied to a levelled subfloor. The subfloor must have sufficient compressive and tensile strength and be free of cracks. The subfloor must also be clean, permanently dry, free of grease and dirt and meet the requirements of DIN 18365. Check the residual moisture percentage (anhydrite floors max. 0.5% CM, cement screeds max. 2.5% CM). Preferably level the subfloor with 924 Europlan Hybrid. Cement-based subfloors can also be levelled with 960 Europlan Super. The flatter the floor is, the more attractive the end result will be. It is therefore recommended to sand the levelling layer lightly after complete drying with a gauze pad of coarseness 100 or finer and then remove dust thoroughly using an industrial vacuum cleaner.
  • We recommend allowing both the 924 Europlan Hybrid and the 960 Europlan Super levelling layer to dry the day after the application and use this as a drying day. This will reduce the risk of blister formation in the LiquidDesign due to moisture retention after applying the primer.
  • 350 LiquidDesign is not suitable for levelling surfaces.
  • Before levelling, the surface must be properly pre-coated. This is important to ensure good adhesion of the levelling layer to the surface, but the primer also helps prevent air holes in the top layer of the levelling compound, so that they cannot pass through to the 350 LiquidDesign. This makes it necessary to prime highly porous subfloors and repair areas twice; the first layer must be completely dry before applying the second layer of primer. The choice of primer depends on the type of surface.
  • Non-ventilated subfloors or subfloors poured directly on the sand bed, etc., must be provided with a moisture barrier instead of the above-mentioned primer layer.
  • After sufficient drying of the levelling layer, sand it lightly and remove dust, then prime it with an opaque layer of 043 Europrimer Alphy. Apply the primer with an 828 or 830 Microfibre roller 11 mm. This applies both to 924 Europlan Hybrid and 960 Europlan Super. The primer layer must dry out for minimum 12 hours (overnight).
  • Existing dilations in the surface must be respected and always continued in the 350 LiquidDesign.
  • Always consult our technical product information sheets before starting work. In case of doubt about the applications to be made, contact our Technical Advice Department in advance.


User manual:

Step 1. Preparation:

  • Order sufficient product from one batch for large flooring projects.
  • For all buckets of A-component to be processed (per colour), check that the batch number is the same. This prevents nuance differences in colour in the end result.
  • Check that all necessary tools are present.
  • Make sure that the material is sufficiently acclimatised in the room where it will be processed (min. 24 hours before processing). The material must have the same temperature as the surface on which it is processed.
  • Check the residual moisture percentage (anhydrite floors max. 0.5% CM, cement screeds max. 2.5% CM), floor temperature and climatic conditions, ensuring they meet the indicated specifications. Also determine the dewpoint at the floor surface using e.g. a Caisson LVT-15 thermo-hygrometer. The surface temperature of the floor should be at least 3 °C above the dewpoint.
  • Avoid direct sunlight during the work. If necessary, cover windows with cardboard, for example, so that the floor has the same temperature everywhere.

Step 2. Mixing:

  • Mix the material (speed approx. 300 rpm) with a mechanical mixer, preferably in a separate room next to the room where the 350 LiquidDesign floor is being applied.
  • Protect the floor and walls, etc., of the mixing area with e.g. plastic sheeting or an equivalent protective material and fix it to the surface with suitable tape.
  • Shake the still closed can of component B gently and, after opening, add the entire contents to component A. Then mix the mass into a homogeneous composition (mixing time minimum 2 minutes).
  • Pour the LiquidDesign mass into a clean, empty bucket and mix again for at least 1 minute.
  • When processing multiple buckets of LiquidDesign, the same mixing time should be followed for each bucket, e.g. by using a stopwatch. In addition, the mixed LiquidDesign mass must be processed immediately. This makes it essential to maintain good communication between the mixer and the processor.

 Step 3. Processing:

  • If any holes have appeared in the levelling layer, these can be closed with LiquidDesign, e.g. using a putty knife, prior to applying the 350 LiquidDesign floor.
  • Spread the 350 LiquidDesign mass evenly, using the 837 Decokam no. 78, with a layer thickness of approx. 2 mm on the floor. Do not apply a layer thickness of more than 2.5 mm. Uneven distribution can cause an aesthetic disturbance on the surface of the LiquidDesign floor.
  • Replace the Decokam regularly (after approx. 300 m²) so that the correct layer thickness is always applied.
  • Make sure that the LiquidDesign mass is not loaded with moisture (e.g. drops of sweat) to prevent bubbles forming in the top layer.
  • Immediately after applying the 350 LiquidDesign layer, it must be rolled with the 834 bleed roller 20 mm to achieve an even distribution of cork particles and make the comb marks disappear. Use standard pinhole soles (after sharpening the sharp points in advance to avoid damaging the primer layer) to be able to walk through the wet applied LiquidDesign. Preferably, do not walk through the rolled mass again.
  • After at least 12 hours of drying time, the LiquidDesign floor is walkable and sufficiently dry to be finished further with 355 LiquidDesign Finish. This paint system must be applied within 48 hours.
  • Clean the tools immediately after use with 358 ToolCleaner, rinse them with tap water and then allow them to dry thoroughly..

 Step 4. Finishing with 355 LiquidDesign Finish:

  • Check the floor surface for any dust or other dirt particles; if present, remove them. Remove any pimples/bumps with 180/240 grit sandpaper
  • Prevent footprints on the floor by wearing shoe covers.
  • Shake the still closed can of component A well before use.
  • Pour the base material (component A) into a mixing bucket and add the hardener (component B) completely while mixing.
  • Mix the 2-component 355 LiquidDesign Finish with a mechanical paint mixer (speed approx. 300 rpm) for minimum 3 minutes.
  • Pour the mixed 355 LiquidDesign Finish through a sieve (approx. 400 µm size) into a clean empty bucket and mix again with a clean paint mixer for minimum 1 minute.
  • After approx. 10 minutes of waiting time, the mixed 355 LiquidDesign Finish can be applied.
  • Spread the finishing layer evenly over the floor surface using a 828 or 830 Microfibre roller 11 mm previously saturated with 355 LiquidDesign Finish (consumption between 125 - 150 g/m²).
  • Immediately after applying the finishing layer, roll over it with a saturated roller. Use a roller width of 25 cm or 50 cm depending on the floor surface area.
  • Applying only one layer of 355 LiquidDesign Finish is sufficient.
  • When applying the finishing layer, use 835 stump nail shoes (minimum diameter 10 mm) to avoid making depressions in the LiquidDesign floor. When doing so, keep walking in front of the roller.
  • 80% of the paint will have hardened after 24 hours and the floor is then walkable with care.
  • The finishing layer is completely hardened after 8 days. As a result, it is important that within the floor is not contaminated within these 8 days with dirt and/or moisture which can lead to damage to the floor finish. Covering is only possible with a vapour-permeable but waterproof covering fleece.
  • Remove fresh (not yet hardened) paint spots directly with water. After hardening, the material can only be removed mechanically.
  • Clean the tools immediately after use with tap water, then allow them to dry thoroughly. Microfibre rollers must not be re-used.
  • Always consult our technical product information sheets before starting work. In case of doubt about the applications to be made, contact our Technical Advice Department in advance.
  • Avoid contact with eyes and skin and use suitable protective equipment (see safety data sheet).

More information:

  • Keep out of the reach of children.
  • Ventilate the room thoroughly during and after the processing and drying process.
  • Do not eat, drink or smoke while processing this product.
  • In the event of contact with eyes or skin, flush with plenty of water immediately.
  • Only send packaging without residues for recycling.
  • Dispose of product residues and cleaning fluids according to the local environmental regulations and do not pour into drains.
  • For detailed information on safety measures, please refer to the safety information sheet on our website eurocol.nl.
  • Component B contains isocyanates. May cause an allergic reaction.

Tips for keeping your LiquidDesign floor looking beautiful:

  • For cleaning and maintaining LiquidDesign liquid floors, we recommend 312 Conditioner. The protective film ensures that less dirt adheres. If used regularly, it preserves the appearance of the floor (without a shiny effect). Absolutely do not use chlorine or bleach.
  • Ensure that there is a good clean-up system at the entrance.
  • Equip chair legs with soft protection (such as cork or felt) and replace them quickly in case of damage/wear.
  • Equip rolling furniture with soft wheels.
  • Avoid long-term point loads, as this can lead to permanent damage.

Underfloor heating constructions:

LiquidDesign can be applied to floors with underfloor heating. The start-up protocol of the underfloor heating must be fully executed in advance in accordance with the supplier’s guidelines. Switch off the heating one day before application; then switch the heating back on again at least 72 hours after painting, in steps of maximum of 5°C water temperature per day. Make sure that the floor temperature does not exceed 29 °C.

Processing conditions
Desired ambient temperature : 15° - 25 °C.
Temperature for material and underfloor  : min. 15° - max. 20 °C
Relative humidity : 50 - 70%.


Instruction movie:
Click

Quality and guarantee

Environment and health

Hazard Class : See safety data sheet.
Safety and environment : Safety data sheets of Forbo Eurocol products according to EEG-guideline 91/155. Keep out of reach of children. Do not eat, drink or smoke while processing the product. Only give completely empty containers for recycling. Bound material residues can be disposed of as household waste.
MSDS : Sent digitally or available on www.eurocol.nl.


Articles

Article DefinitionPackagingEAN-code
350LiquidDesignComponent B: Environmentally friendly jerry can (based on PE), 4.5 kg.                        
350LiquidDesignComponent A: Environmentally friendly bucket (based on PE), 12.5 kg. 

Titanium
8 710345350464 

Stone
8 710345350471 

Pearl
8 710345350488 

Ashes
8 710345350495 

Silver
8 710345350501 

Platinum
8 710345350518

Lead
8 710345350525 

Zinc
8 710345350532

Concrete 
8 710345350549 

Steel
8 710345350556

Quartz
8 710345350563 

Bark
8 710345350570 

Diamond
8 710345350587 

Grey Jade
8 710345350594

Sand
8 710345350600

Vintageblue
8 710345350617 

Olive
8 710345350624

Lemon
8 710345350631 

Deep Ocean
8 710345350648 

Aubergoine
8 710345350655 

Rust
8 710345350662

Charcoal
8 710345350679 


Instruction video